How To Publish A Book On Amazon In 2023: Step By Step Guide
Thinking about how to publish a book on Amazon but don’t know where to start? Self-publishing on Amazon can be tricky, but with our instructions, it will be simple and straightforward. Even if you are scared of self-publishing, we have every step planned out for you.
In this guide, we’ll actually walk you through every step of the process, so you don’t make any mistakes that can limit exposure for your book or even get you banned.
From choosing a title to promoting your book after it’s published, you’ll have a clear simple clear process that you can use to self-publish on Amazon.
So, let’s get started.
Let’s Talk
Are you a writer aspiring to pen a masterpiece that never fails to captivate? Look no further. Reach out to us and uncover how we can help you to take your writing to unprecedented heights!
How To Publish A Book On Amazon (Step-by-Step)
Below are 12 SIMPLE steps that can help get your book live and start making sales on Amazon in just a few hours.
- Create a Kindle Direct Publishing Account (KDP)
- Enter Your Book Title and Subtitle
- Choose Your Author Name
- Write Your Book Description
- Confirm Your Publishing Rights
- Choose Your Book’s Keywords
- Choose Your Amazon Categories
- Set Your Book Age And Grade Range
- Upload Your Book to Amazon
- Create or Upload Your Book Cover
- Set Your Book Price
- Promote Your Book
Psst… Before we begin, keep in mind that you cannot create multiple Amazon accounts. So, double-check if you have an account already (most people do). If you have an amazon shopping account, you do not need to create a new account. Simply login to kdp.amazon.com using your amazon email. This is important because so many new publishers unknowingly create multiple accounts (which are against Amazon’s T & C) and inadvertently get their accounts suspended in the process. Don’t try to outsmart them, AMAZON has a way of finding out and linking multiple accounts from the same IP address.
Step 1: Create an Amazon Kindle Direct Publishing Account (KDP)
Sign in through your existing Amazon account if you already have one. If not, you can just create a new one and set it up.
This is what you’ll need to do:
1. Go to kdp.amazon.com and click on “Sign Up”
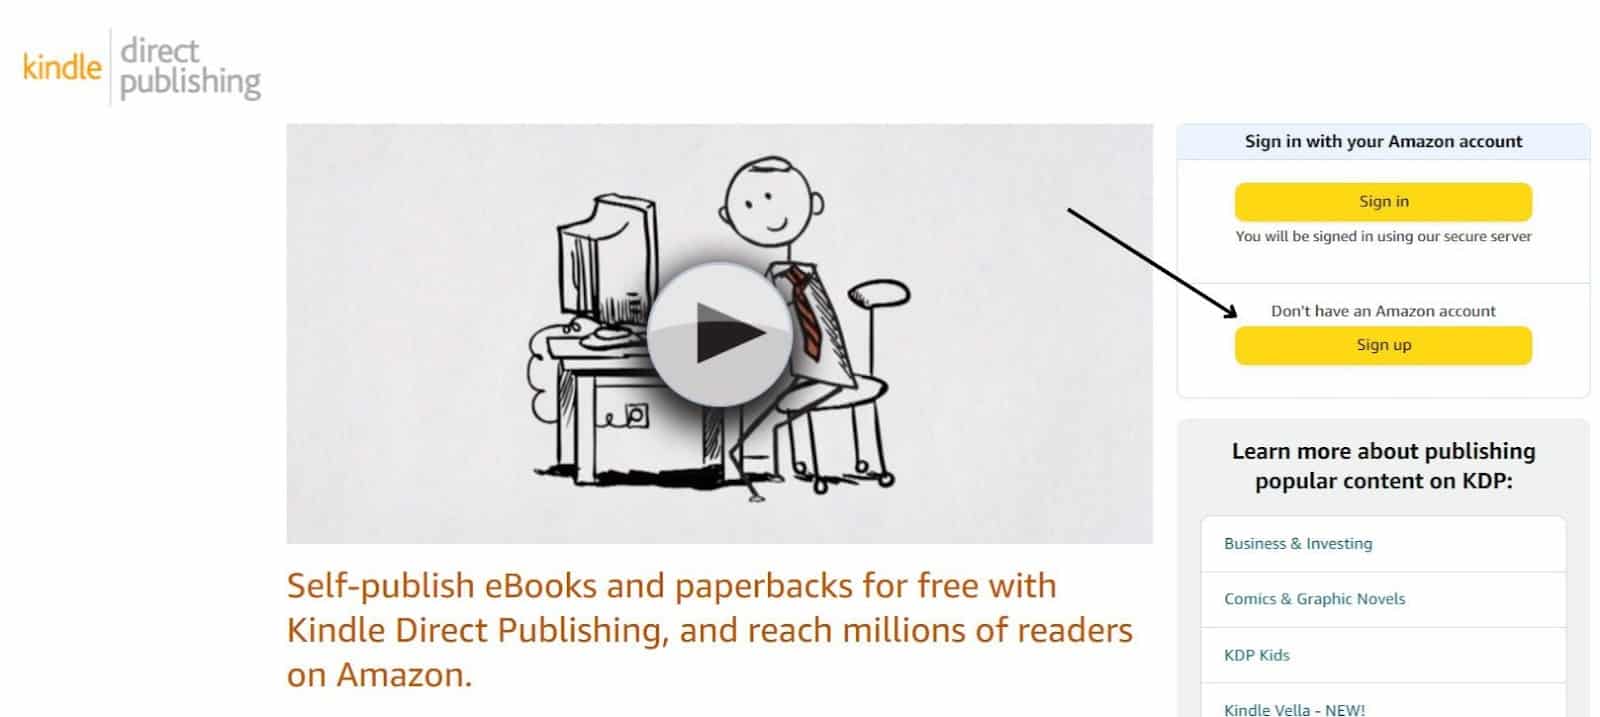
Once signed up, Amazon will send a verification mail to your email address. Check your mail and verify your address through the link sent in your email.
2. Click on “Update Now” and complete your Amazon account setup by entering all the required information
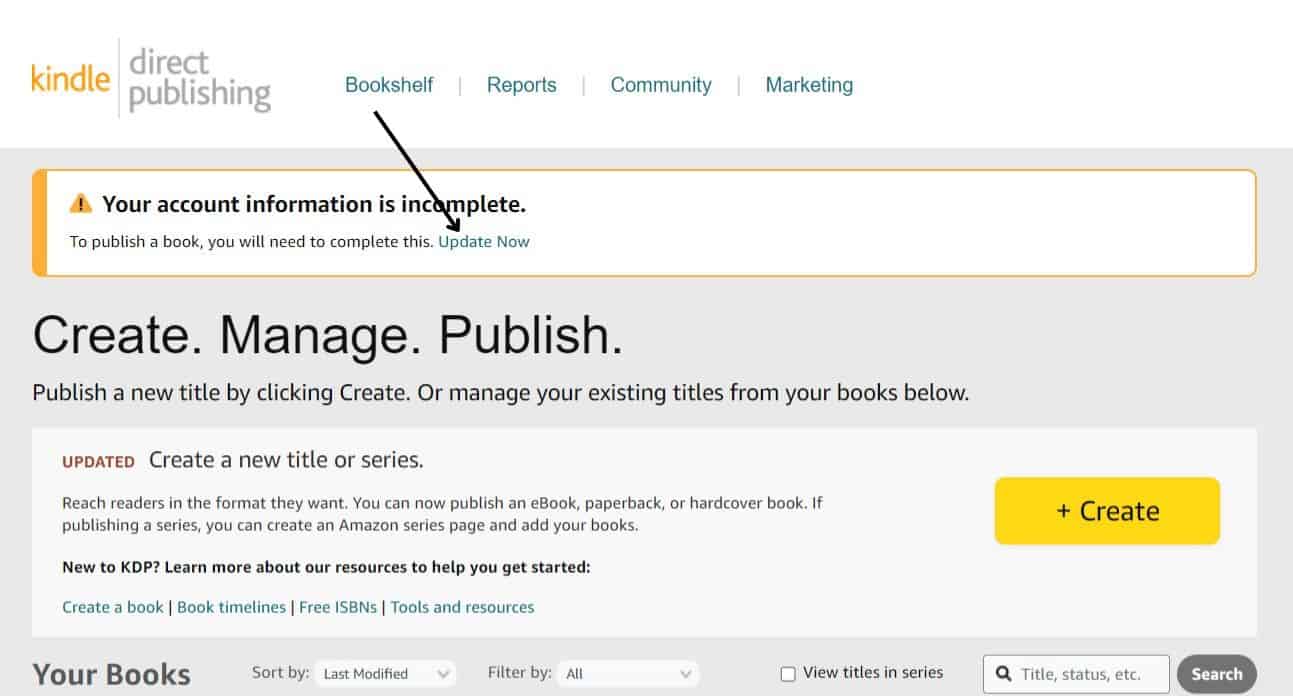
3. The next step has three sub-steps that need to be done with caution.
- First, fill in your personal information as an author (choose “individual” if you’re just an author. Or select corporation if you have an LLC).
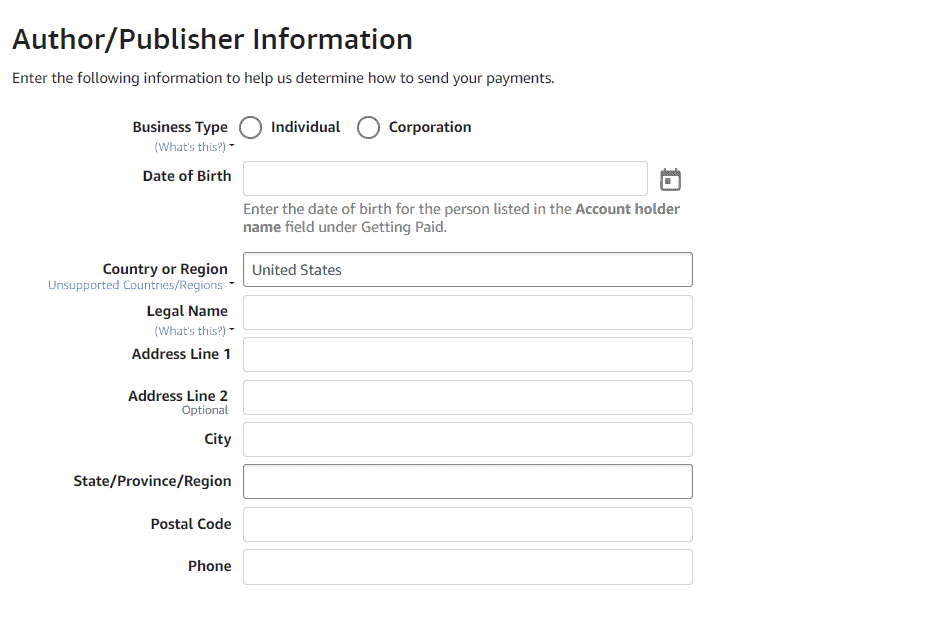
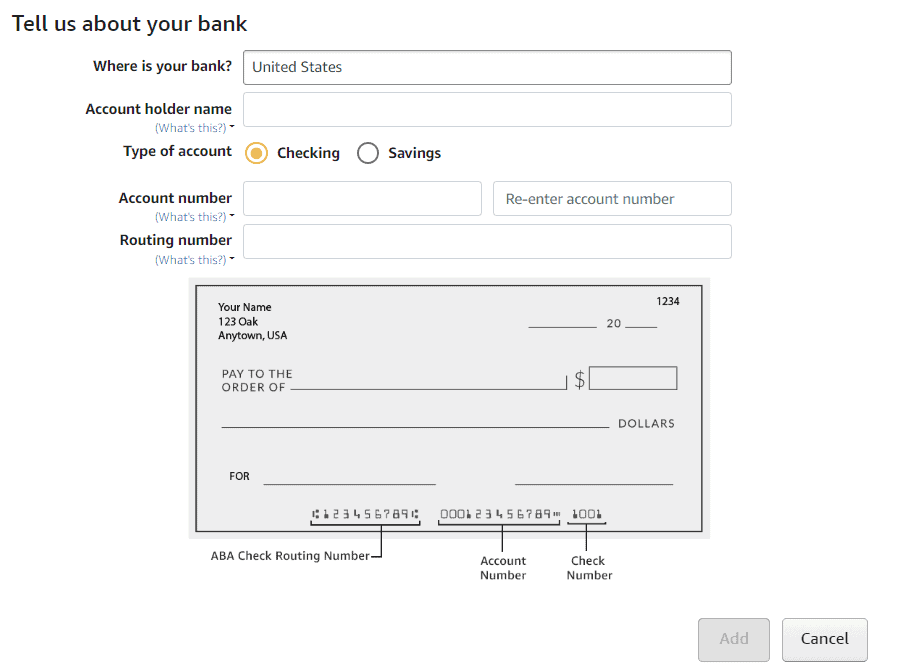
- Second, fill in your payment information. It’ll require you to fill in a U.S/UK/Canada/Australian bank account.
- If you do not have any of those, sign up with Payoneer to get a free U.S bank account.
- Lastly, you’ll be prompted to take a quick tax interview. Click on “Complete Tax Information”. This will take you to a page where you’ll have to enter your personal tax information.
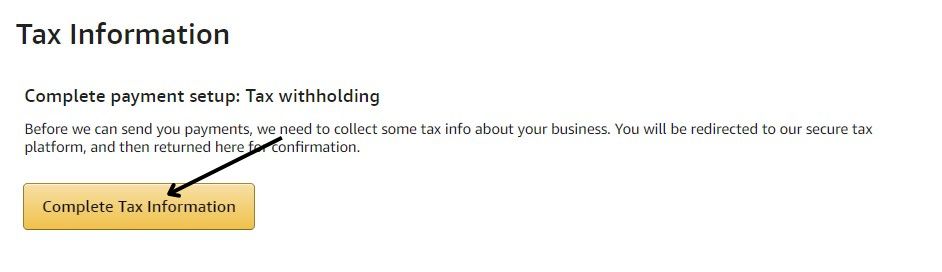
- Select “Individual” if you’re an author or “Business” if you have an LLC.
- Select “US Citizen” if you’re one. Otherwise, select the “Non-US Citizen” option
- Next, if you’re acting as an intermediary agent for someone, select “Yes”. Otherwise select “No”. Since you’re publishing your own work, select “No”
- Next, enter your “Tax Identity Information”. Most of the fields will already be filled in. Just enter your Taxpayer Identification Number (TIN) and that’s it. If you do not have a TIN, you can skip it.
- Click on “Continue” and you’ll be redirected to your Amazon KDP interface.
It’s done.
You have created your Kindle Direct Publishing account. This is where you will publish your book. Be very careful when filling out your personal information.
Small mistakes like this are common in self-publishing and they can cause big problems in the future.
If you make a mistake like spelling your name wrong or forgetting a digit in your account, you could get your royalty payments stuck.
Or, even worse, Amazon suspending your account because you entered the wrong name or TIN.
Step 2: Enter Your Book Title and Subtitle
Once your account is set up and approved (instantly), then you’re ready to start publishing.
The first step is to create a new Kindle book project and enter your book title and subtitle.
This is what you’ll need to do:
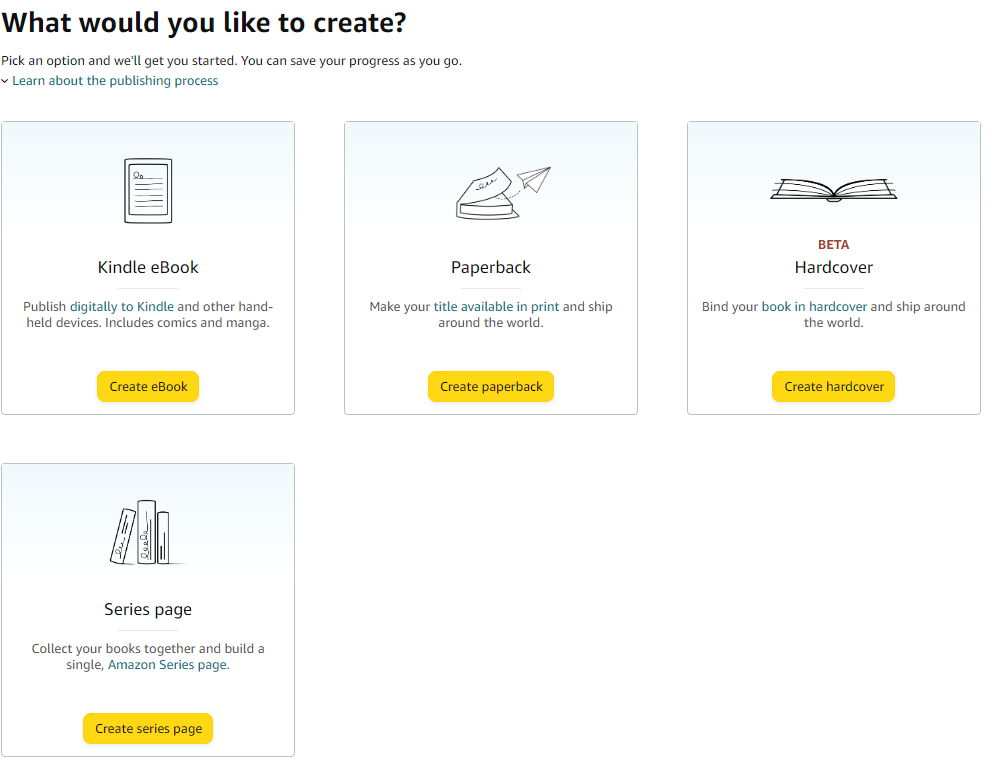
1. On your KDP interface, click on “Create”

2. Next, you’ll be asked whether you want to create a “Kindle ebook”, a “Paperback”, or a “Hardcover”.
I’ll go with the Kindle ebook for this guide, although the process for other formats is pretty much similar.
3. Under the “Kindle eBook Details”, choose the “language” of your eBook, as well as your book title and subtitle.
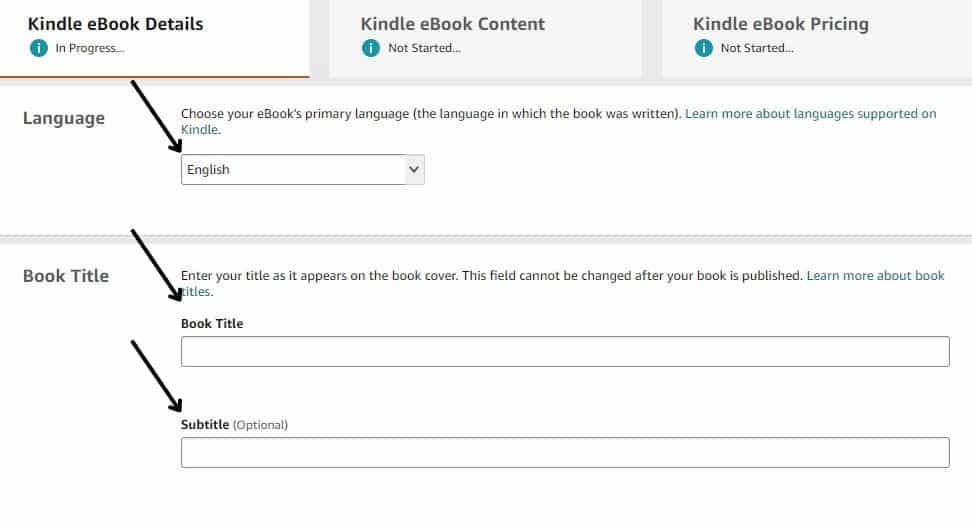
Note: Your book title must be strong, catchy, and benefit-driven [Hint: use our book title generator for amazing ideas]. There are many benefits to creating a great title:
- Your customers will be more interested in your book if it has a good title.
- A good title will also make your book easier to find.
- It is important to give your title a “hook” – one that will grab people’s attention and make them want to read your book. For example, “The Subtle Art of Not Giving a F*ck” by Mark Manson is exactly what I call a “click-worthy” title.
- The subtitle is optional, but you shouldn’t ignore it. You should also consider adding it, as it can be helpful in letting people know what your book is about.
There are some great tools to help you come up with ideas for book titles. Brainstorming is a good way to come up with ideas, but if you’re having trouble, these tools can help:
Amazon Book Title-Generating Tools
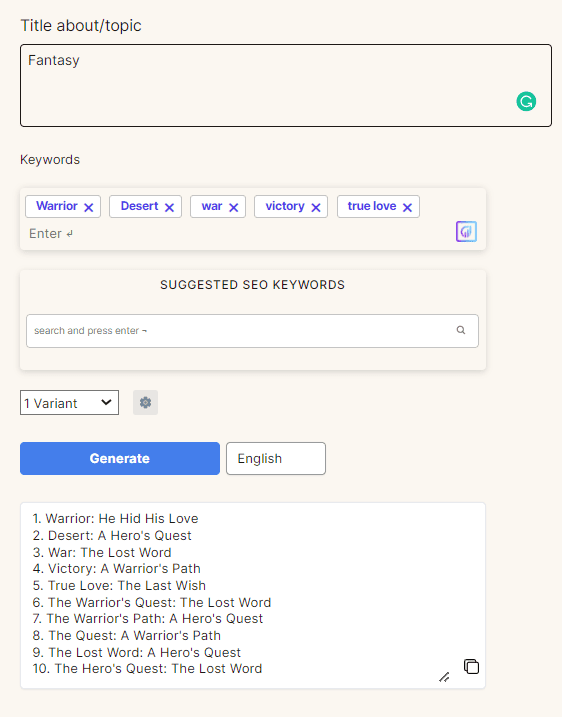
1. AISEO Title Generator
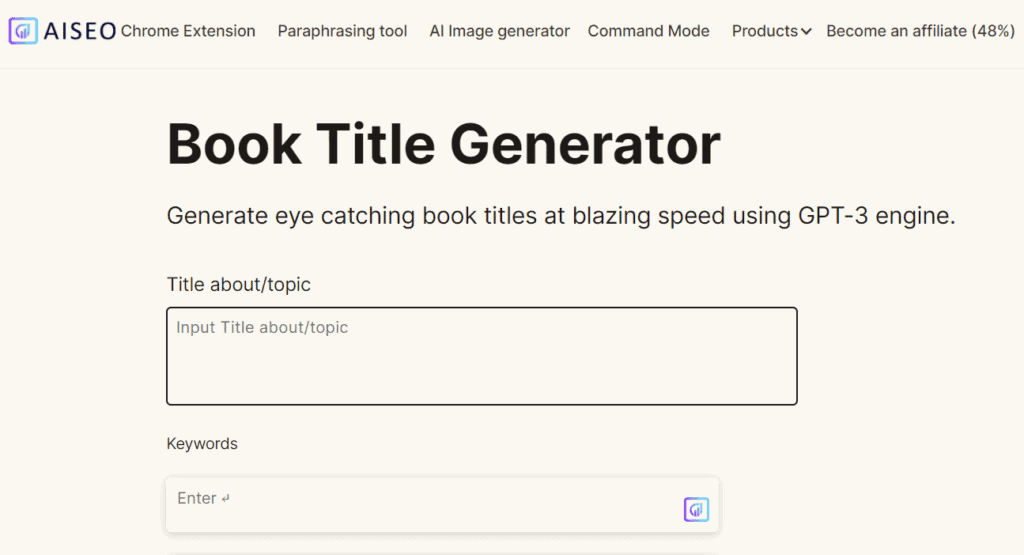
This is one of the best tools that can help you come up with great titles for your book idea. All you need to do is:
2. Adazing Title Creator
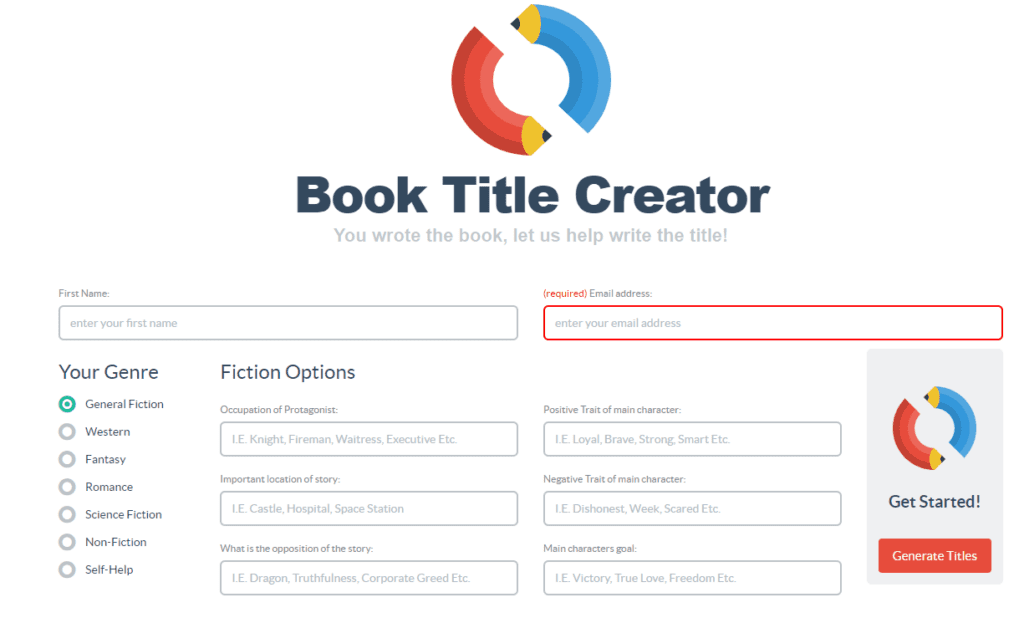
It is another powerful tool that can help you come up with very precise and strong titles for your book.
Just enter
- Your name
- Precise details related to your book
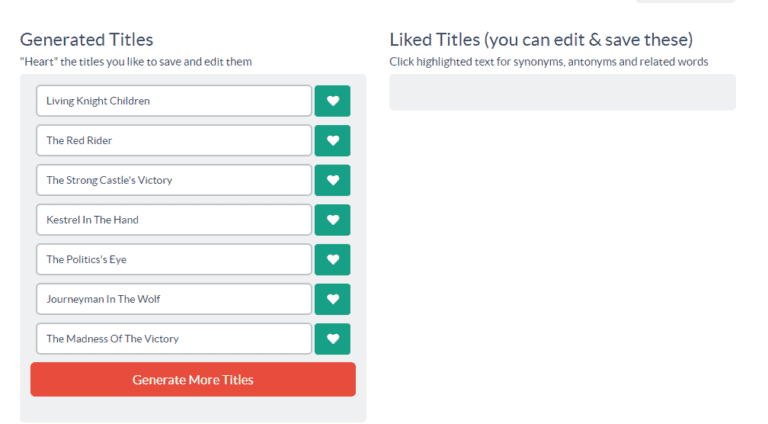
Here is an example:
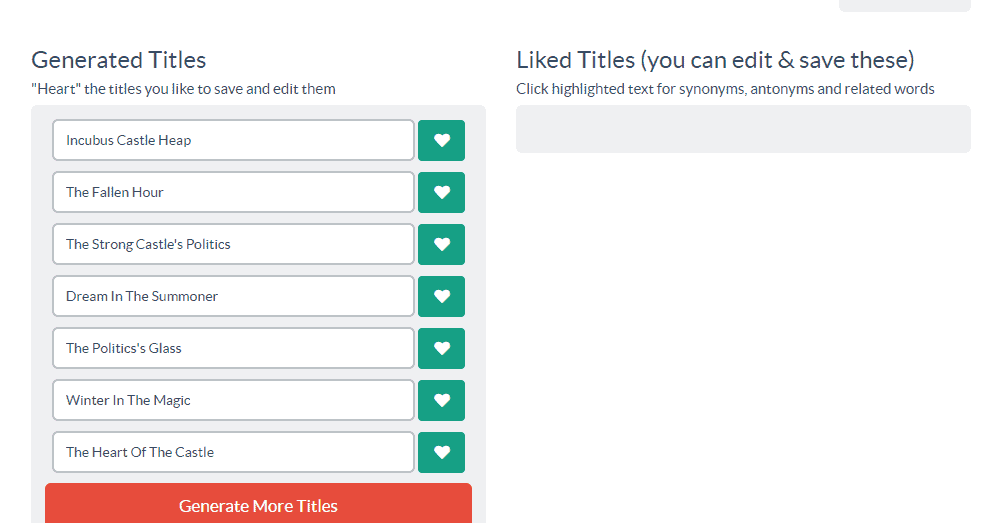
If you’d like more options, you can generate more titles. You can also use our inbuilt tool to generate book titles:
Why Writing Good Kindle Book Title Matters
If you’re really planning on making good sales with your self-published book on Amazon, then you must understand Amazon SEO.
It’s important that you optimize the title of your book according to Amazon’s SEO best practices which have been proven to work.
I’ve seen a lot of new authors publish their books on Amazon, and then they complain that they don’t sell many copies. But this is often because their titles (and subtitles) were not written or optimized well.
Your book’s title should neither be too wordy nor stuffed with keywords.
It is also important that your book’s title is not too long, as people will not be able to see it all when they search for it on Amazon.
This means that they may not click on your book, resulting in a lower Click through rate (CTR). Similarly, if your title is stuffed with keywords, it may look like spam to Amazon’s Algorithm and this could affect your book’s visibility or even get your account suspended or terminated.
So, you need to find a good title that makes people feel something, but you also want it to be good for Amazon SEO. That way, more people will buy your book.
You need a book title that is short, persuasive, and focused on the value or benefits your book provides. You should also optimize it for Amazon SEO so that more people can find it when they are looking on Amazon.
Step 3: Choose Your Author Name
Now you need to choose a name to use for your book.
This will be the name that people see when they purchase or look at information about your book. You can use your full name, or choose a pen name if you want to be anonymous.
You should choose a name for your writing that stands out and reflects your brand or style. If you want to keep your identity private or write in different genres, you can use a pen name.
You can create a pen name by combining your own name and a pseudonym. For example, if your name is John Smith and you want to use the pen name “J.S. Publishing”, this could be an option.
Just make sure that whatever author name you choose is easy for readers to remember and recognize when searching for your book online.
If you are having a hard time thinking of a pseudonym, there are free name generators like Namelix, Fakenamegenerator, Reedsy, and Namegenerator that can help. Simply can enter some keywords and the generator will give you a list of potential names.
Tip: Make sure you do your research on any names you are considering to make sure they aren’t already in use by another author or brand. You do not want to breach Amazon’s guidelines and you could be penalized for what Amazon calls “misleading metadata”, a term for when authors use keywords or other information to mislead readers into thinking the book is something it’s not.
Once you have selected your name, create an author page on Author Central.
This is a free platform Amazon provides that lets you customize your brand presence and connect with readers. It’s a great way to promote your book, list your upcoming releases, and manage the rights to your work.
Step 4: Write Your Book Description
After you’ve entered your title and subtitle, it’s time to write your book description. This is where you “sell” your book. It is your sales copy, so you should write in a way that makes people want to buy it.
This is a very important part of marketing your book because people often use the description to decide if they want to buy it. You want to make sure that the description makes people want to buy your book.
What you need to do:
1. Scroll down under the “Kindle eBook Details” tab and look for the “Description”
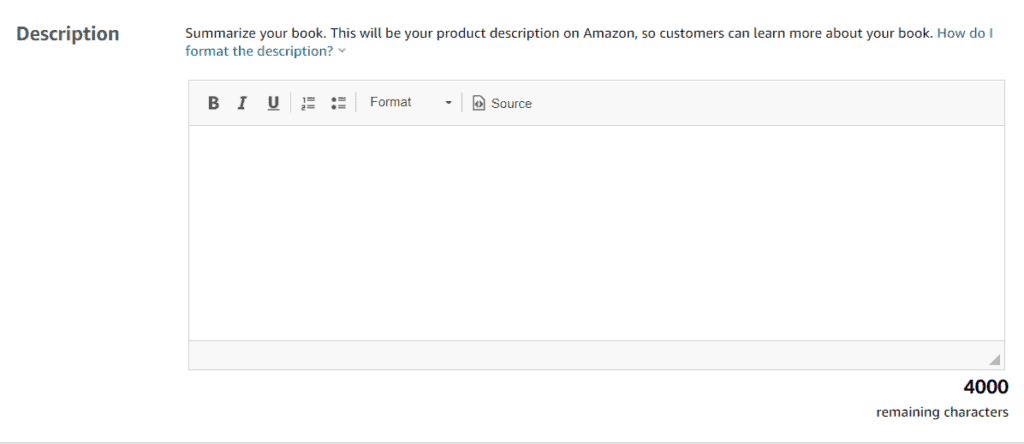
2. Write a description of your book that is interesting and makes people want to read it. Your description can be up to 4000 characters long, but I recommend keeping it under 2000.
To write a good description for your book, start by writing down 3-5 things that make your book special. Then use these points to create a description that will make people want to buy it.
Make sure to include all the important information, such as the title, genre, and any awards or special recognition your book has received.
Also, don’t forget to make it interesting and exciting by using active voice that will catch your their attention.
Here are a few tips to use:
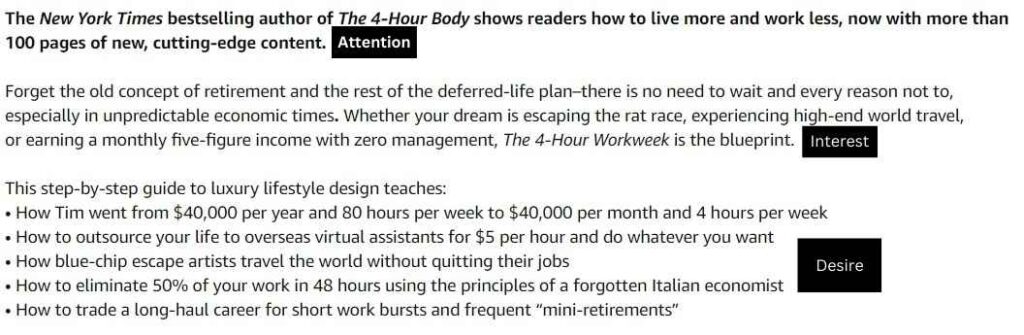
- Use AIDA (Attention, Interest, Desire, Action) copywriting technique to engage your customers.
- Use “power” keywords that appeal to emotions and make your readers take action
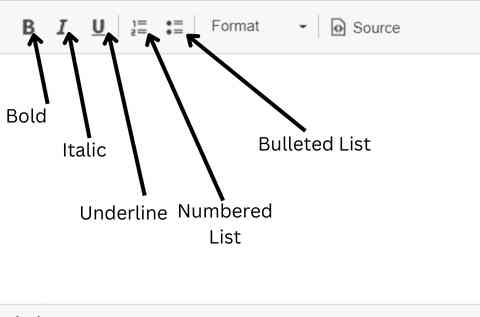
- Format your description. You can use Amazon’s in-built description formatting tools to format your book’s description:
Tim Ferris’s 4-Hour Work Week’s has a great Amazon description that is well written.
On the other hand, Douglas Rushkoff’s Why We Listen to What “They” Say has a poorly written Amazon description.

Leverage Amazon Description Generating Tools
Formatting book descriptions takes skill. Not everyone can do it well, but that’s okay. Some people hire experienced writers to create the descriptions for them. If you’re not good at doing this yourself, using a description generator is a good idea.
Below is my favorite one…
Kindleprenuer’s Free Book Description Generator

This is my favorite book description-formatting tool. Let’s take a look at the bad description example I shared earlier and use this tool to make it better.
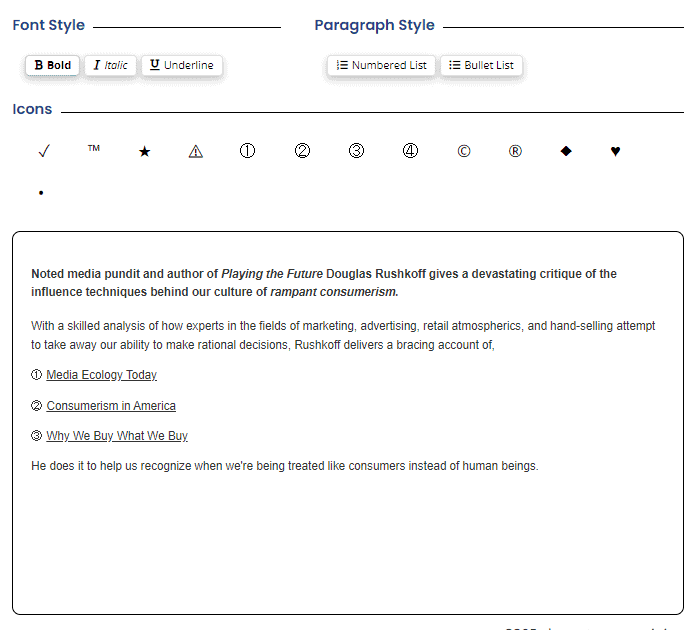
The wording is the same but in a different format. This can help people understand it better.
Why Writing Good Book Description Matters
The description of your book is important because it tells people what the book is about. It tells them why they should buy the book.
Even if your writing is very good, people might not know what they’re getting unless you explain it to them in your copy.
I experimented with different ways to describe my books (with A/B testing) to see what works best for describing books. I found that when I changed the way I described my books, sales went up by 17 to 25%.
If you cannot write a good description for your book, I suggest that you get help from a professional copywriter.
This is your “pitch” to customers. If it isn’t compelling, no one will want to buy from you.
Step 5: Confirm Your Publishing rights
If you are the author of the book, choose the radio button that says “I own the copyright and I hold the necessary publishing rights.”
If you write a book, you own the copyright to it from the moment you create it. This means you have the right to publish it, sell it, or give it away.
Step 6: Choose Your Book’s Keywords
Amazon lets you put in 7 keywords for your book. What are they for? They are terms that people might use to search for your book on Amazon.
So, making sure your book’s keywords are good will help people find it more. When they find it, they might buy it. More sales means you make more money!
How to enter your book keywords:
1. Scroll down under the “Kindle eBook Details” and find the “Keywords” section.
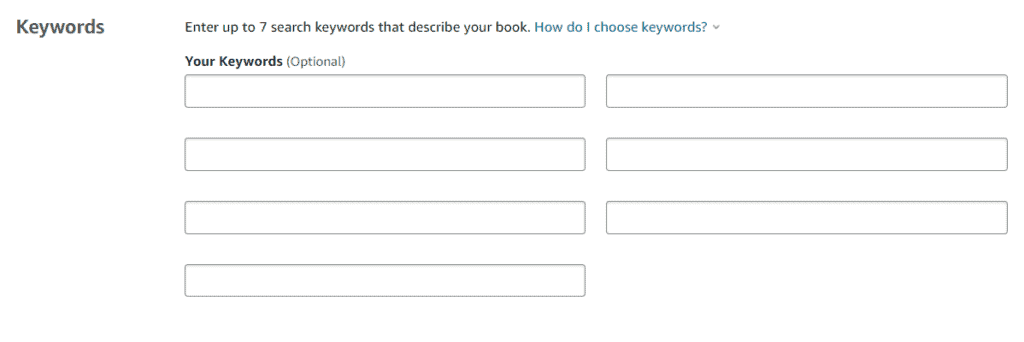
2. Write the 7 most relevant keywords that you think will help your potential customers to reach your book easily
Pro Tip: You don’t have to write only 7 keywords. I mean, why write only 7 when you can write 30 keywords? Wondering how? Just enter as many keywords as the character spaces allow. Each box allows up to 50 characters, so that means an average of 5 to 7 keywords per box depending on each keyword length.
How to Properly Research Keywords for Your Book
You can do it through free as well as paid methods/tools. We’ll discuss both…
Free Method/Tool
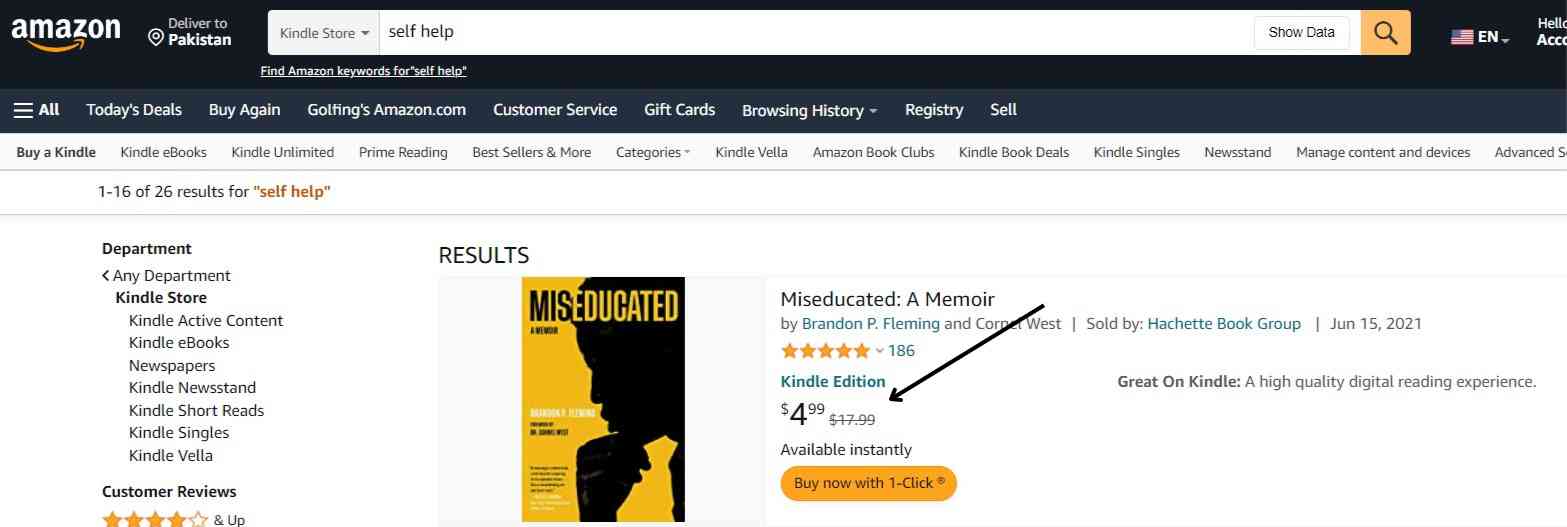
1. Amazon Search Bar
When you want to find a good keyword for your book, the Amazon search bar can help 🙂 . Just select “Kindle Store” and type in the keyword that is most relevant to your book. Then the Amazon search bar will try to suggest some more ideas for you.
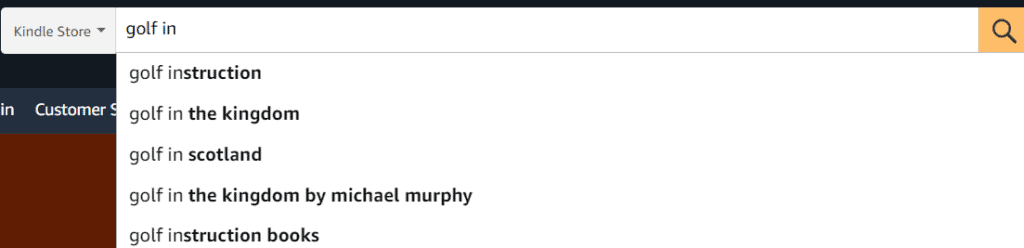
Once done, select the most relevant to your book from the autosuggestions and include them in your book keyword slots.
2. Sonartool
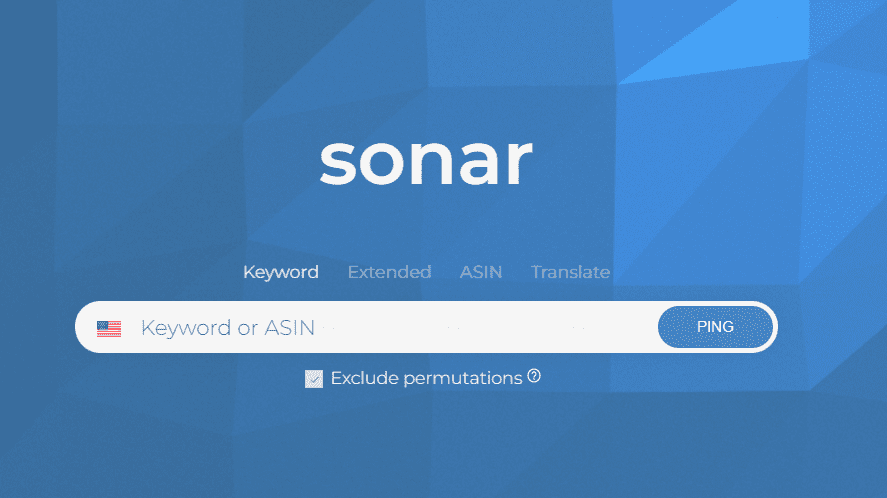
When I type in “Golf Instructions”, I get 29 keyword suggestions for free.

3. Publisher Rocket
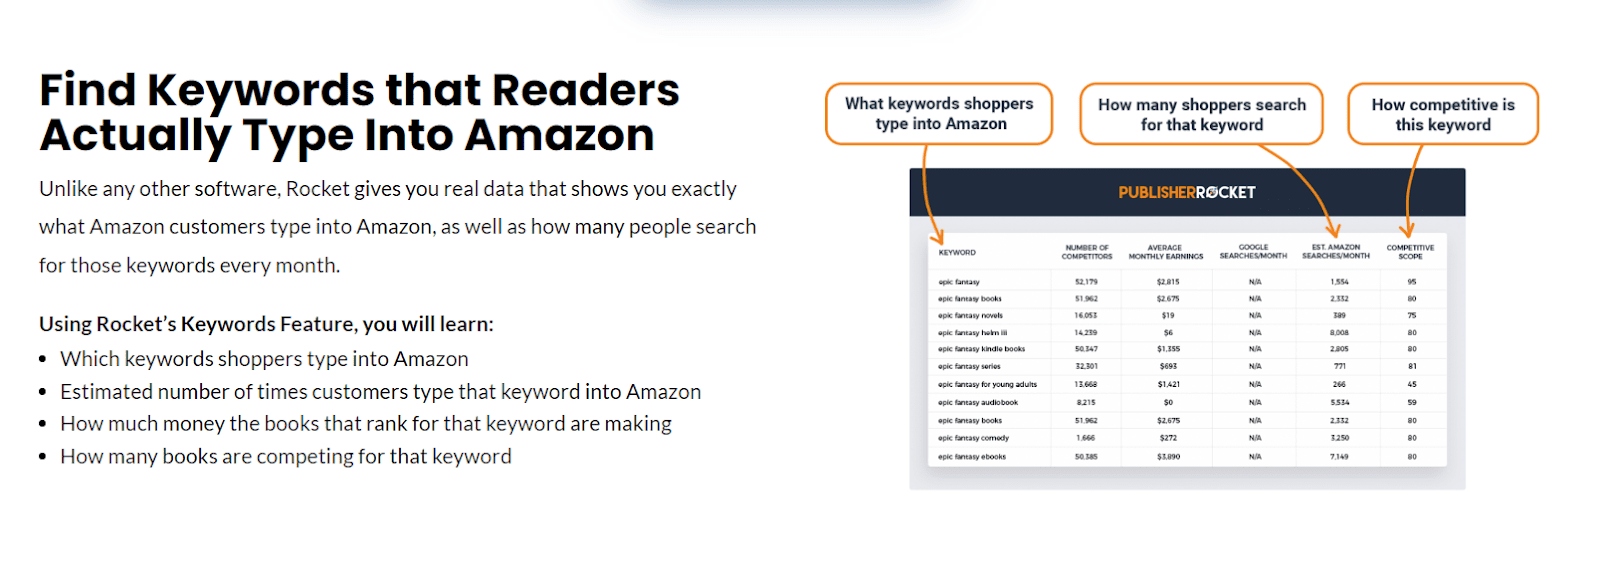
Publisher rocket is the go-to tool for Amazon Kindle publishers for keyword research mainly because of extra data points such as the competitiveness of a keyword and search volume.
If you want to do great SEO for your kindle book, I highly encourage you to invest in this tool.
4. KDSPY
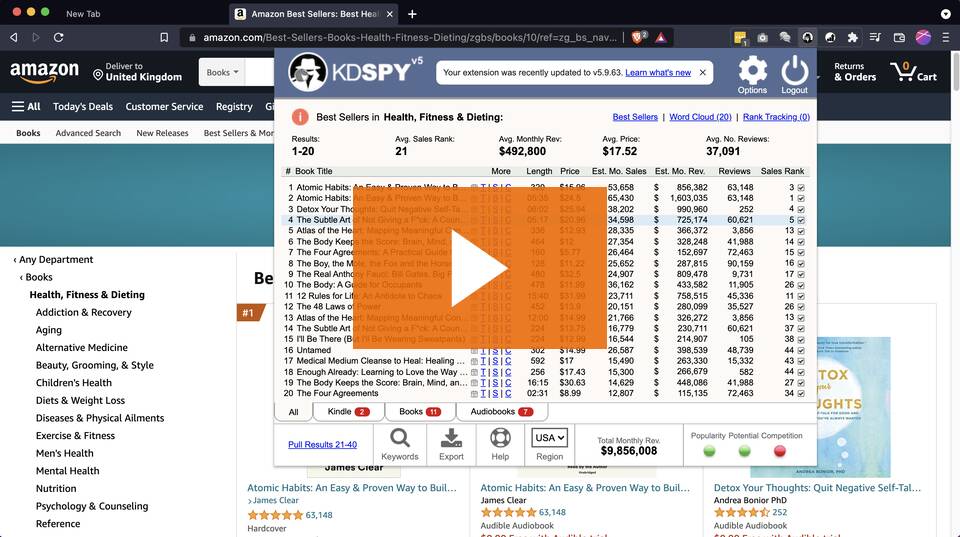
KDSPY is basically a chrome extension that gives you important data about keywords directly on the Amazon page. It’s another great tool for niche and keyword analysis and a must-have if you want your book to appear for as many search terms as possible.
CAVEAT: Be careful with the keywords you choose and decide to include in your book keyword slots. There are certain Amazon guidelines regarding what types of keywords are prohibited.
How To Properly Optimize the 7 Keyword Boxes
Here are some PROVEN tips that work:
- Fill the first three boxes with the most relevant keywords and phrases related to your book. Take help from keyword-research tools.
- Fill the rest of the boxes with niche-relevant keywords. Use all 50 characters and try to add keyword phrases from all possible angles. Some things to consider include:
Benefits of Well-Optimized Keywords
Why Finding the Right Keywords for Your Book Matter
You don’t want your book to be lost among all the other books on Amazon, right? If you do not use the right keywords, your book may never show up in Amazon’s search results pages and you’ll never be able to sell any copies no matter how well-written your book is.
Step 7: Choose Your Amazon Categories
After entering your keywords, next is to select the categories under which you’d want Amazon to feature your books and rank them accordingly.
What you need to do:
1. On the “Kindle eBook Details” tab, scroll down and find “Categories”
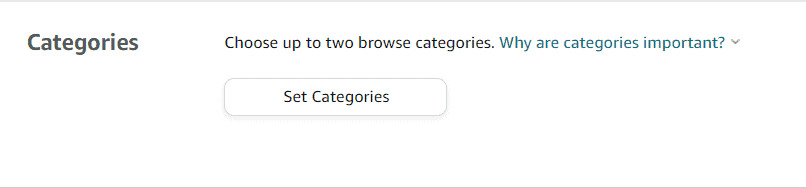
2. Click on “Set Categories” and choose the two most relevant categories to your book’s niche
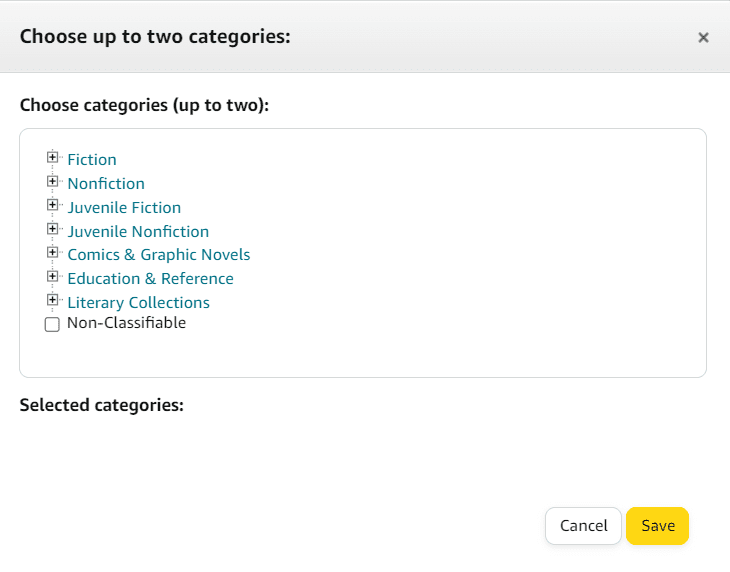
Pro Tip: You can choose up to 10 categories for your book. However, you’ll need to contact Amazon to be able to add your book to the 8 extra categories (aside from the standard two categories).
How to Research the Best Categories for Your Book
It’s not a good idea to put your book in very competitive categories. However, if you choose a smaller category, make sure it is very relevant to your book.
This will help you avoid getting in trouble with Amazon.
There are a few things you can do to help you find the best categories for your book.
- You can look at what your competitors are doing
- Try to find categories that are low-competition and trending.
- You can also make a list of the unique sub-categories your competitors are ranking for.
You can choose two categories on Amazon when you list your book, but you can also rank for eight more categories if you want.
There are two ways to go about that:
- You can make your book appear in a specific category on Amazon by typing the category name into the keyword boxes. You should also include those words in your title, subtitle, and description. If people start buying your book, Amazon might decide to rank it for that specific category.
- If you want, you can ask Amazon to rank your book under specific categories. They will review your book and see if it is suitable for those categories. If it is, they will approve your request.
Why Choosing the Right Categories For Your Book Matters
First of all, if you choose the wrong categories, your book may never be found by people who are looking for it. It might also be harder for your book to rank high on Amazon if you choose the wrong categories.
You might get your KDP account suspended or banned if you choose irrelevant categories. Amazon considers it spammy.
After selecting your categories, next is to choose the age and grade range.
Step 8: Set Your Book’s Age And Grade Range:
This section is optional. It lets you to choose the age range as well as the grade range you want your readers to be.
You can leave it blank if you are not publishing a children’s book or if you have explicit content for an 18+ audience.
Pre-order:
The pre-order option is also available for books that have not been released yet. This will allow customers to order the book and receive it as soon as it becomes available.
I recommend skipping this option unless you have a large network of followers that are eager to buy your book as soon as it is released.
The next step is to proceed to the “Kindle eBook Content” tab to upload your book.
Step 9: Upload Your Book to Amazon
So, you’ve filled in all the mandatory details of your ebook and it’s time to finally upload your ebook manuscript to Amazon.
Click “save and continue” and proceed to the Kindle eBook Content tab.

Here, you have to select either the “Yes” or “No” radio button on “Enable digital rights management”.
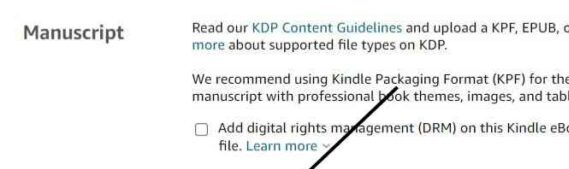
This setting helps protect your content from piracy by preventing people from making unauthorized copies of your book.
However, if you want your readers to be able to share your book with others, it is best that you select “No”.
Next, you will be required to upload the manuscript in a format that is supported by Amazon, such as a .doc or .pdf file. If you are using other formats, make sure to convert them first.
We’ll discuss the procedure for the Kindle eBook, Paperback, and Hardcover formats.
How to Upload an eBook Manuscript on Amazon Kindle Platform
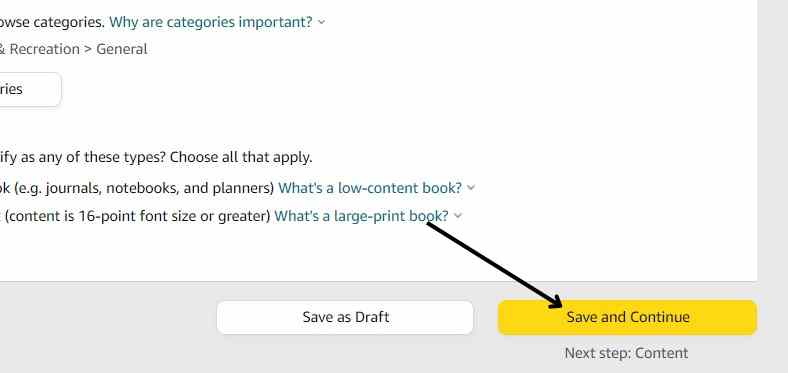
1. After filling in all the basic details under “Kindle eBook Details”, click “Save and Continue” at the bottom of page
2. It will direct you to the “Kindle eBook Content” tab. Upload eBook manuscript file
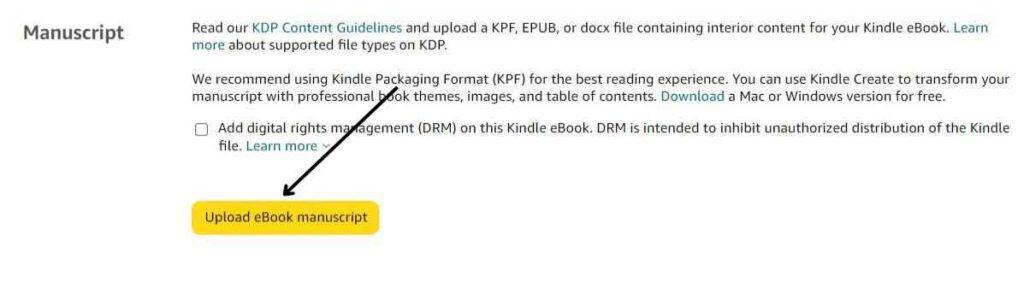
3. Upload a .doc file (after you’ve created your book in Microsoft word). You don’t need to worry about converting it to other formats.
How to Upload a Paperback Book on Amazon
1. Fill in all the basic “Paperback Details” (same as we did for kindle eBook) and hit “Save and Continue at the end of page. You’ll need an ISBN number for your paperback book (but don’t worry, Amazon will assign you a free one if you don’t have)

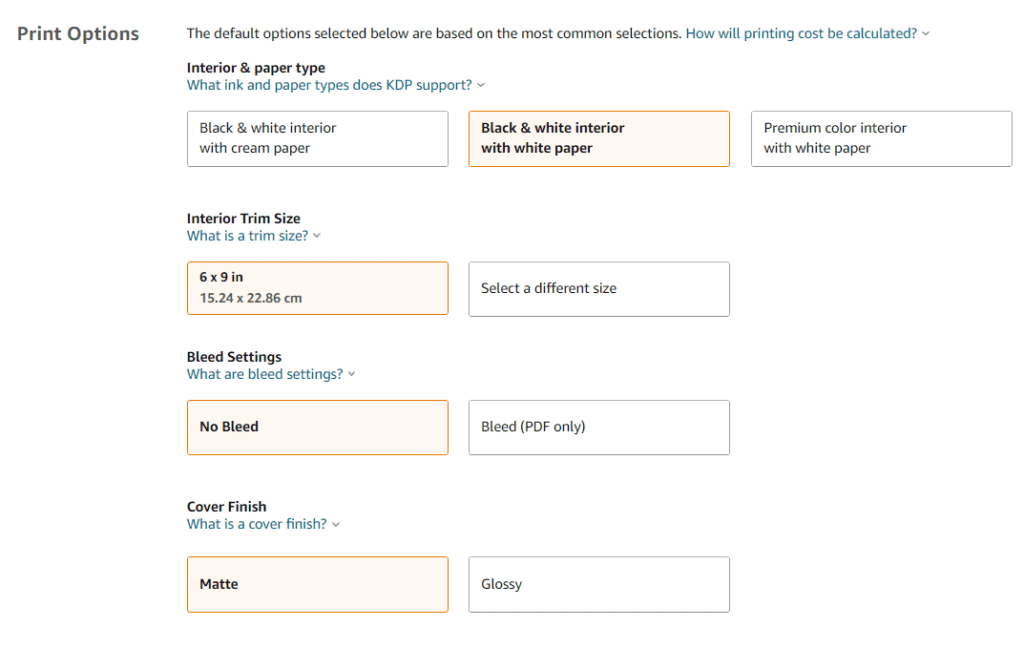
2. Choose your print options
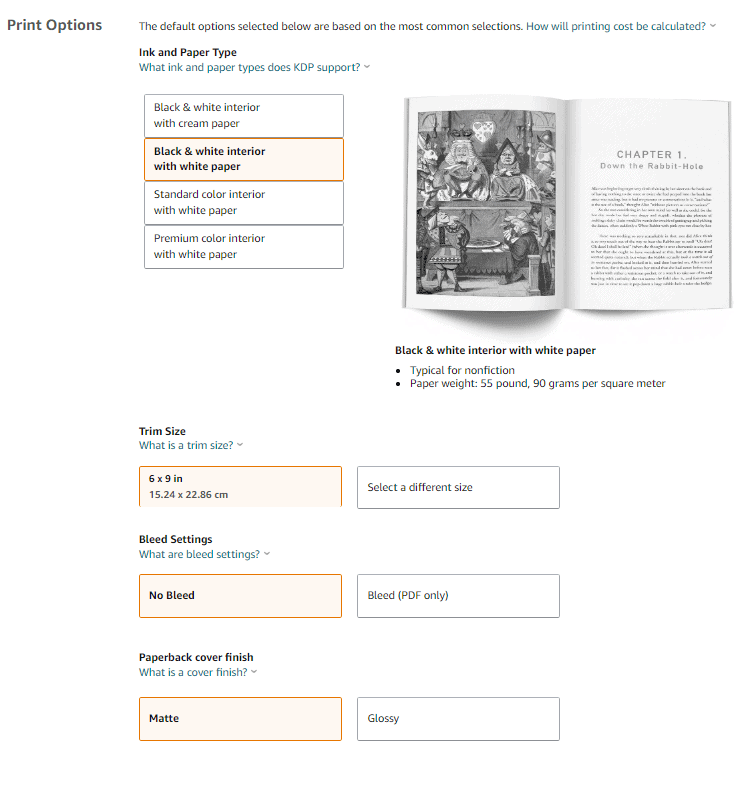
3. Upload your paperback book manuscript. This should be in doc, HTML, or pdf format. I prefer uploading paperback manuscripts in pdf print format.

4. And you’re done
How to Upload a Hardcover Book on Amazon
1. Same as before, fill in the “Hardcover Book Details” and hit “Save and Continue” at the bottom of page.
2. Choose your print options
3. Upload your Hardcover book’s manuscript

4. And you’re done
List of Supported Kindle Formats and Their Pros and Cons
| Format | Pros | Cons |
| DOC/DOCX | Good for simple formatted books | Complex book formats don’t convert successfully sometimes |
| KPF | Official Kindle format, also known as Kindle Create | Comes with limited formatting options |
| EPUB | Best format for ebooks, resize and reflow impeccable | Digital Rights Management (DRM) is optional — Every EPUB file won’t have it |
| ZIP/HTM/HTML | Gives you the luxury to format any way you want through coding | Too technical |
| RTF | Enough formatting options | Not supported by Kindle previewer |
| TXT | Good format for image-less manuscripts | Can’t convert image location preferences |
| It’s printer-friendly, best for graphical manuscripts | Don’t resize and reflow well on kindle | |
| MOBI | Used to be the Kindle’s go-to format | Kindle no longer support it |
Writing Yourself vs. Hiring a Ghostwriter: What to Prefer?
If you want to, you can write your ebook yourself.
But if you don’t have enough time or if you get stuck, you can use a writing tool that will help. AI writing tools, like Grammarly and AIWriter, can help you get through the writing process faster.
They are smart technologies that can identify mistakes in your content and suggest better wordings to make it more readable.
But having an AI-powered tool doesn’t always guarantee a great ebook – you still need to have an understanding of your target readers and a flair for writing.
On the other hand, if you don’t feel like writing yourself, you can always hire a ghostwriter from popular freelance marketplaces like Problogger, or UpWork.
Make sure the ghostwriter you’re hiring has a good track record of working with other clients and knows a lot about the topic of your book.
Step 10: Create or Upload Your Book Cover Art
Let’s upload your book cover now.
Steps to take:
1. On the “Kindle eBook Content” page, scroll down and find “Kindle eBook Cover”
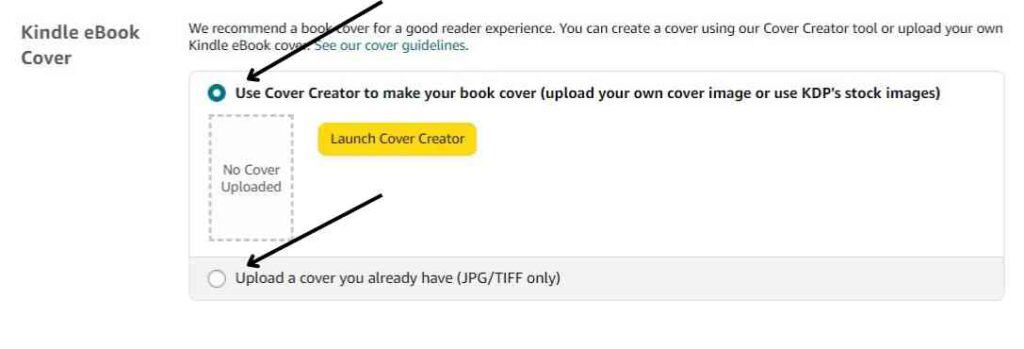
2. There are two ways to make your book’s cover. You can use Amazon’s cover creator or upload your own cover.
Both have their pros and cons: using Amazon’s cover creator is simpler but you might not have the exact design you want.
If you upload your own cover, you can have more control over the design but it might be more complicated.
| Amazon Cover Creator | Custom Book Cover Art |
| Pros – Completely free – Includes an instructional video guiding you to create the best book cover for yourself – Customizable themes let you customize your book cover however you want – The creator will automatically adjust your cover’s dimensions as required by your book | Pros – Element of uniqueness that you can’t get with templated covers – Power of controlling every design element and aspect of your book cover’s design – Gives your book a chance to stand out among competitors – Custom design quality is better than the creator templates |
| Cons: – The included instructional video is a bit technical for beginners – Although customizable, the total number of available templates is only 10 – Manual customization doesn’t provide a lot of editing options. | Cons: – It’s pricey… May cost a few hundred dollars – Not ideal for beginner publishers and authors – It’ll take time as you’ll probably have to work with professional designers |
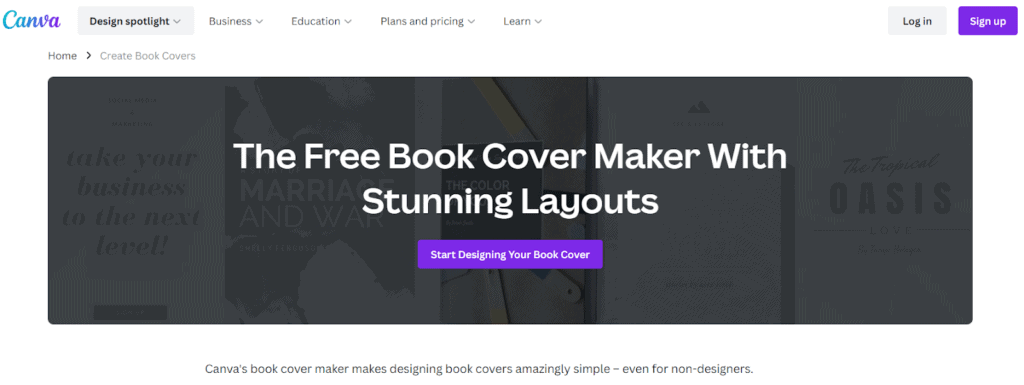
Better Alternatives to Amazon KDP Cover Creator
1. Canva
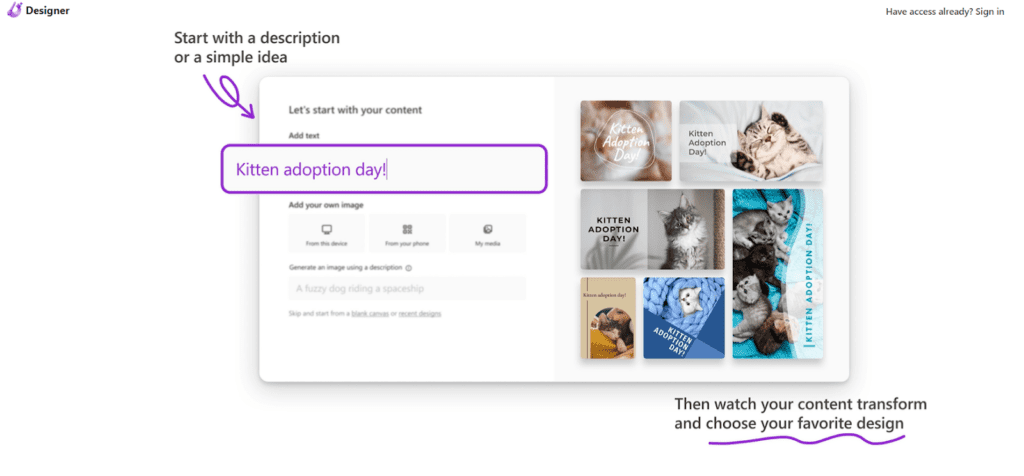
2. Microsoft Designer
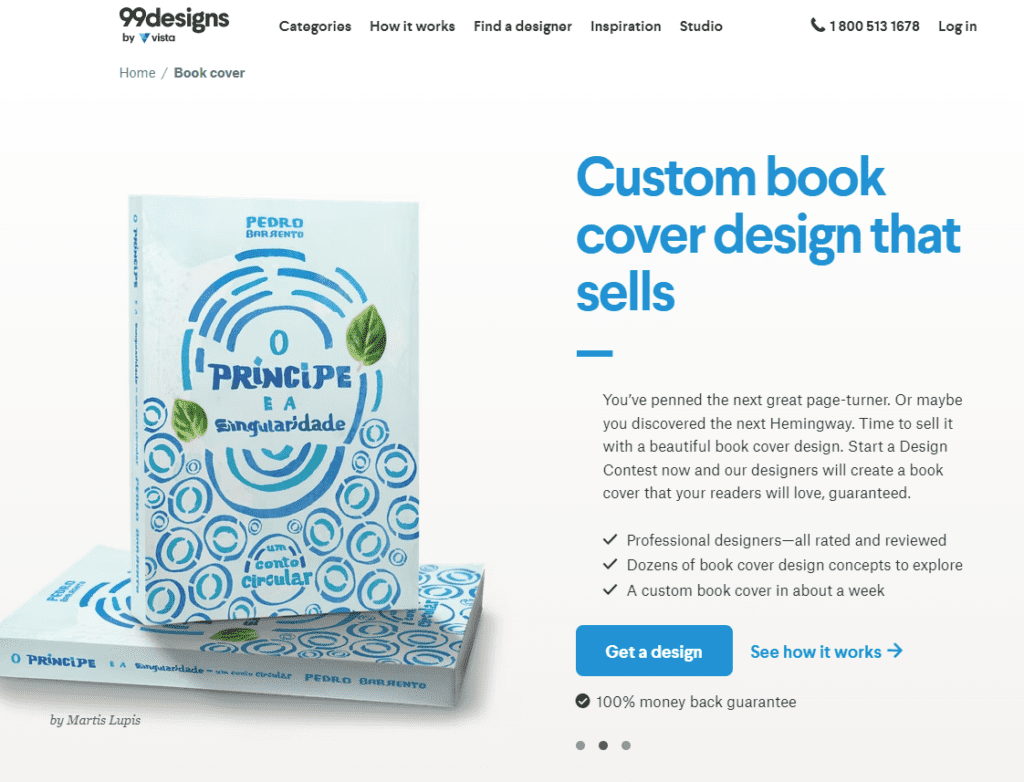
Best Custom Digital Books Cover Design Services
1. 99Design
2. BookBaby
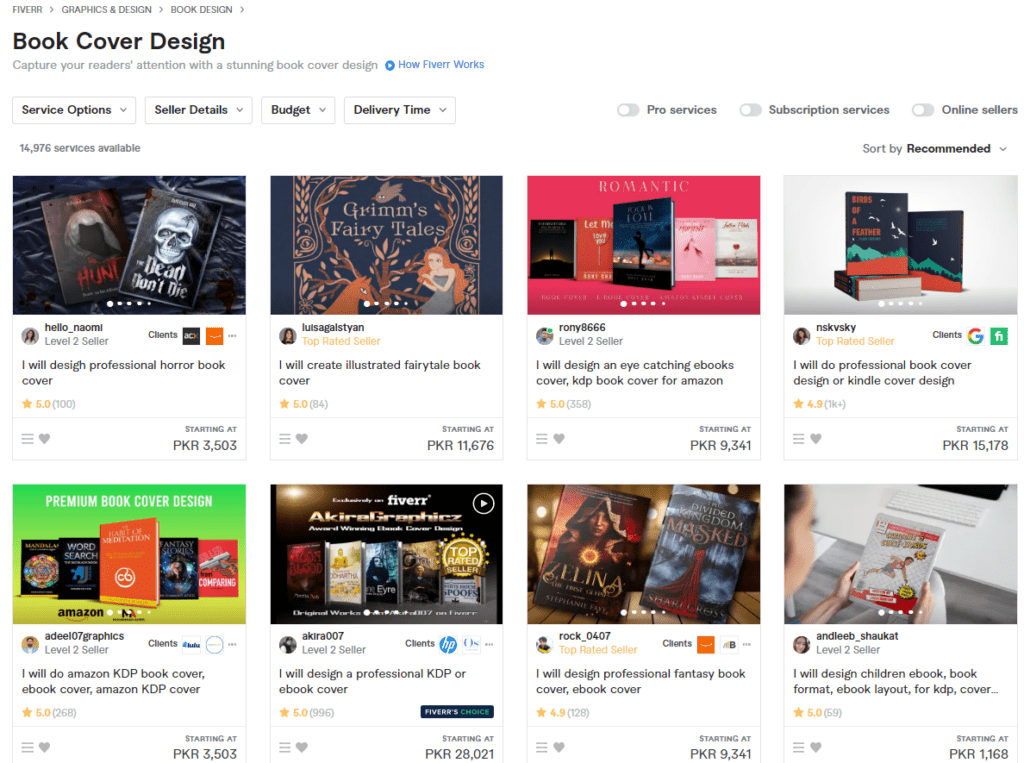
3. Fiverr Book Cover Design Services
Why Designing a Great Book Cover Matters
When you publish a book, you want people to take notice. One way to do that is to have a great cover.
A cover is like a movie poster – it needs to be eye-catching and make people want to know more.
A good cover designer will help you create a cover that does just that. They will consider the tone of your book, the genre, and the target audience.
They will also think about what will stand out on the shelf in a bookstore or library.
A well-designed cover can help sell your book, so it’s important to create the best cover for your book
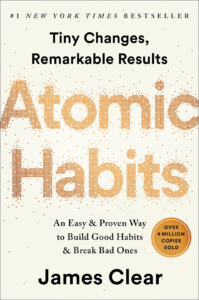
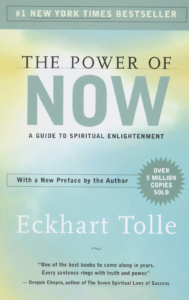
Here are a few examples of KDP books with great covers:

Once you’re done uploading your book manuscript and cover, click “save and continue” at the bottom of the page.
On the Kindle eBook Preview tab, you can check how your book will look on different devices such as Kindle Fire and Kindle Paperwhite.
Once you’re sure that everything is in order, click “save and continue” to move to the next step.
Step 11: Set Your Book’s Price and Hit that Publish Button
It’s time to talk about money… Finally! Let’s set up your book’s price.
This is what you need to do:
1. On the “Kindle eBook Pricing” page, first choose if you’d like to enroll in KDP Select (I’d recommend you to do so if you’re only planning to publish your book through Amazon. Otherwise, don’t).
Amazon has an exclusivity clause with the KDP select program.
KDP Select is a program that allows you to make your book available to Kindle Unlimited (KU) subscribers and Prime members.
With KDP Select, you can also offer your book for free for up to five days every 90 days. This can help you to increase your book’s visibility and sales.
So, I strongly recommend you enroll in KDP Select and earn royalties through Kindle Unlimited and KOLL (Kindle Owner’s Lending Library)

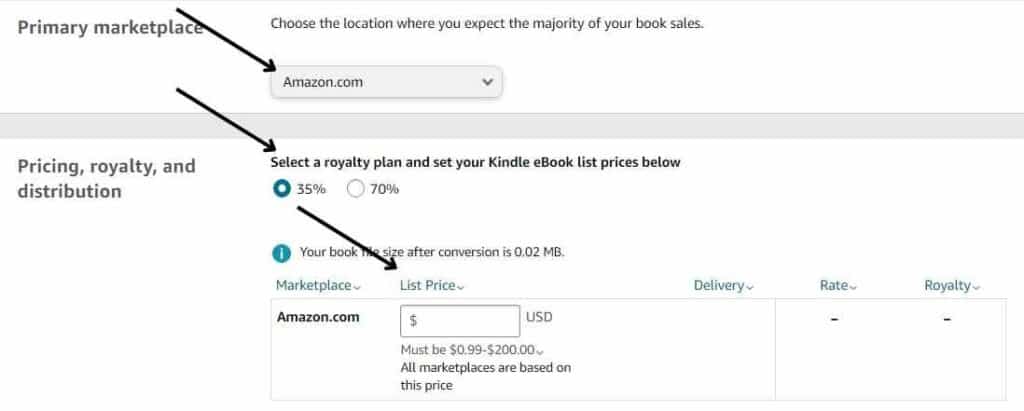
2. Next, choose your desired primary marketplace (which is amazon.com), and your royalty plan. Then, enter the list price.
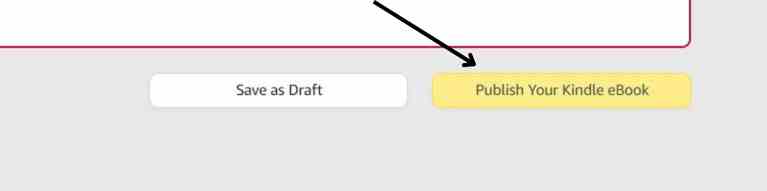
- Now, hit that “Publish Your Kindle eBook” button
Choosing the Right Price for Your Book
This is a topic that requires a comprehensive understanding of ethical, practical, and retailer-authorized rules.
But let’s not get too technical…
Here are a few tips that’ll help you choose the right price for your ebook, paperback book, or hardcover book:
- You can either go with a 35% or 70% royalty plan. To reap the most rewards, I’d recommend you go with the 70% royalty plan for your ebook.
- The 35% royalty plan lets you set the price between $0.99 to $200 while the 70% royalty plan lets you set the price between $2.99 to $9.99
- There are no delivery charges if you go with the 35% royalty plan
- For the 70% royalty plan, delivery charges are calculated based on the size of your book (Amazon charges $0.15/MB), so the larger your book file, the lower the royalty
- The most appropriate range for pricing Kindle ebooks is $0.99 to $9.99, with an ideal price of $2.99. The lower the cost, the more sales. Hence, new authors must try to keep their ebook prices as low as possible.
- Paperbacks usually sell for $9.99 to $19.99. The ideal price depends upon the length of your book as paperback books involve printing fees. You can use the KDP calculator to estimate your expected royalty.
- Amazon uses this formula to calculate the printing cost: “Fixed cost + (page count * per page cost) = printing cost”
- Kindle ebooks aren’t a very recommended way to go because of the tiny and small royalty margins but if you want to name more money from royalties, I’d recommend getting your books into paperbacks, hardcover, and audiobook versions. For kindle ebooks, I advise keeping your price at or slightly above breakeven. It is mainly for promotional purposes.
- The best strategy for pricing, especially for Indie authors, is to start small and gradually go big. Start with the lowest price and increase gradually as you start accumulating reviews
A Few Extra Tips to Set Up the Right Price
- Look at other self-published books in your category and price your book competitively.
- If you aren’t a well-known self-published author, try not to overprice your book. It simply won’t sell. Keep it as low as possible – $0.99 is a great starting point.
- As a beginner indie author, you must first focus on making a name for yourself before focusing on money. Once you’re recognized as an established brand author, money will always come.
In the final step, you can review your settings before publishing. If you are satisfied with all of the choices that you’ve made, simply click “publish your Kindle eBook” and you’re done!
Your book will be included in the Kindle Store within 72 hours.
Step 12: Promote Your Book
Congratulations! You’ve successfully published your book on Amazon KDP.
It’s time to do some promotions to get as much exposure and sales as possible.
Here are a few methods you should try and test and in the end, stick with the ones that bring the most reward…
Amazon’s In-Built Promotional Tools
1. Set Up Your Author Profile on Amazon Author Central
On Author Central, you can set up your author page.
On this page, you can introduce yourself to readers. This is a good way to build relationships and trust with potential customers. As an added bonus, this will help boost your brand’s recognition.
Amazon likes indie authors who have a lot of brand recognition.
Here is the author page of renowned writer Mark Manson on Amazon:

2. Invest in Amazon Advertising (Paid Ads)
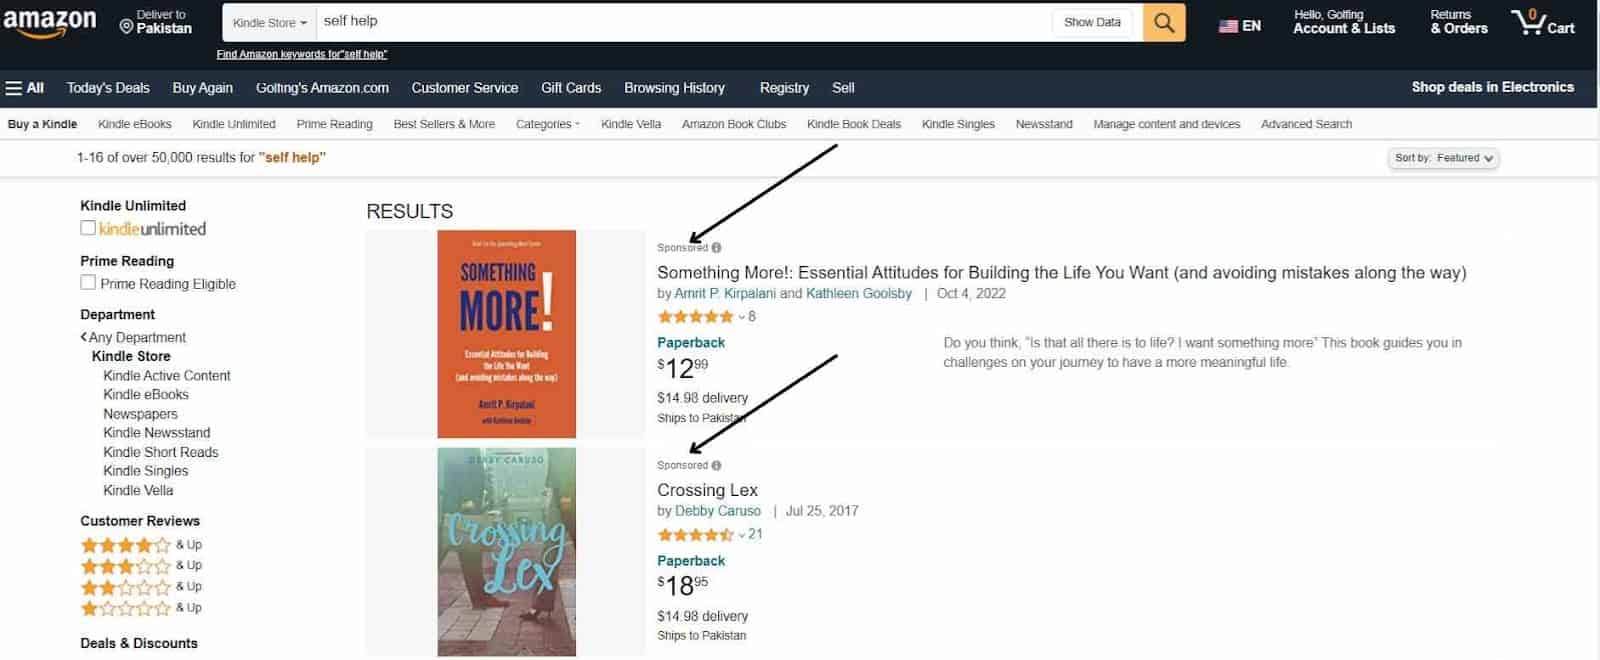
You can use Amazon’s paid advertising to make sure that your book is seen by more people than your competition. You will be able to show your book at the top of Amazon’s search engine results pages (SERP) so that more people will see it.
Amazon will also show your book on “Also Bought” section of the detail pages of other books.
Amazon will quickly learn about your book and start to show it for more keywords and in better positions. Remember that Amazon relies on feedback, so so the more your book is seen and clicked on, the higher up it will rank in Amazon’s algorithms
So the more people who buy your book, the better Amazon will be able to show it. And if you’re lucky enough to get reviews – even better!
That’s how Amazon can recognize that your book is great and help make sure more people find out about it.
It’s important to keep on top of things and make sure that your Ad campaign is running smoothly. That means you’ll need to constantly check on things and change what needs to be changed.
It’s a never-ending cycle of optimization that requires constant monitoring and tweaking
4. Kindle Free Book Promotions and Countdown deals
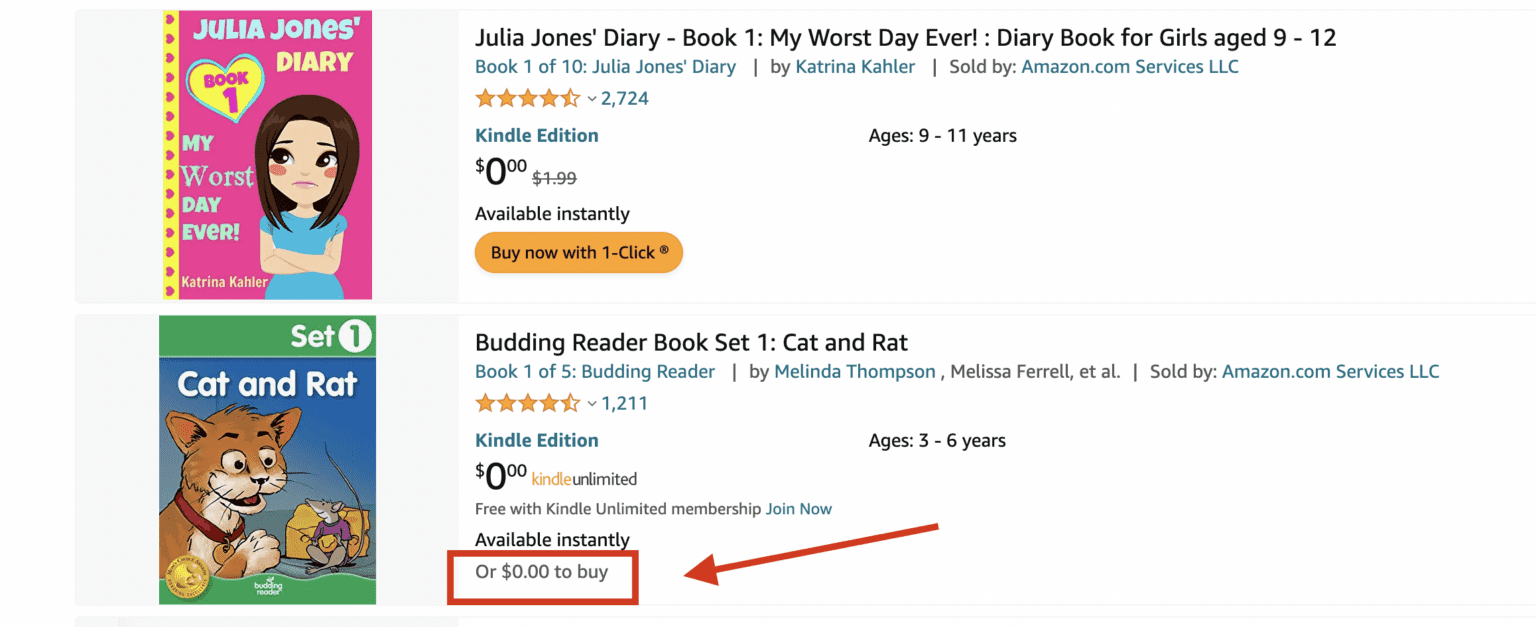
Amazon’s Kindle platform enables authors and publishers to offer their books for free or discounted prices. These promotions are called Kindle Free Book Promotions and Countdown deals, respectively.
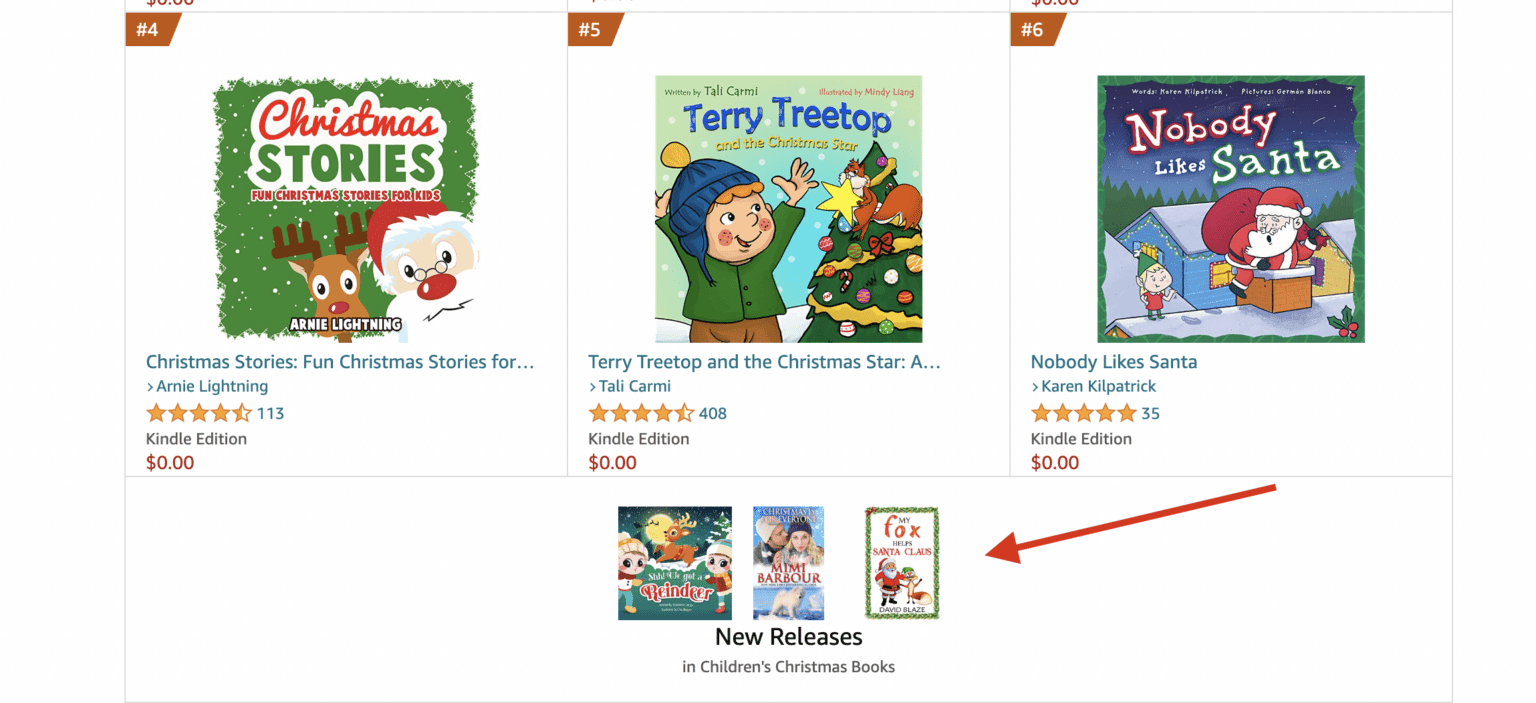
The free book promotion can put your book in the top 100 list of free books in your category. People looking for free books might see your book and download it. This could lead to more sales.
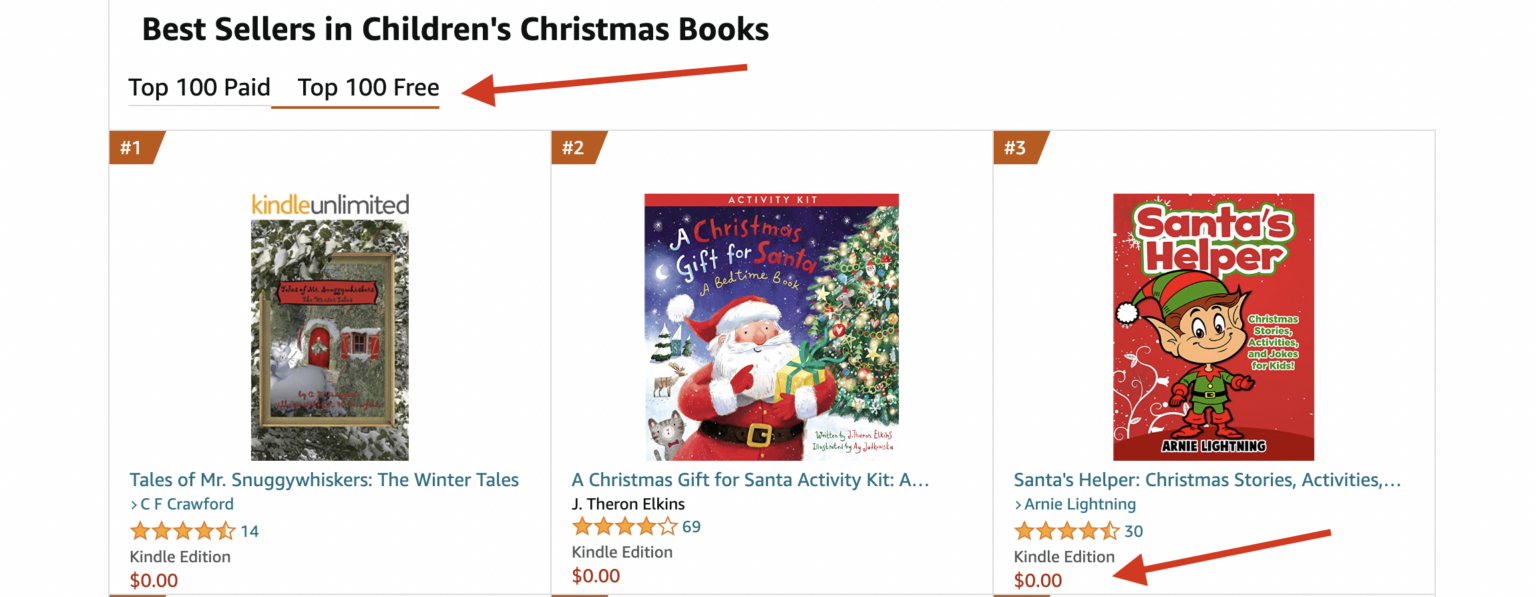
The Countdown deal allows you to discount your book on Amazon’s Kindle store, while still maintaining 70% royalties.
You need to get as many people to buy your Kindle ebook in the first 30 days as possible. This will help you get on the “hot release list” and have a head start on your journey.
Because of this, you must use Amazon’s price promotions and Kindle countdown deals to make your book sell more copies.
However, in order to do this, you must enroll your book in KDP Select. I suggest you enter the Kindle Free Book Promotions for up to three to five days so that more people can see it.
Other Promotional Tools
1. Book Review Sites
Book review sites are a great place to get the word out in the market that there is a new book in town ready to win the market.
You can submit your book to many different book review sites. Some cost money, but others are free. Make sure to submit your book to BookBub, FreeBooksy, and Pubby. They will post a detailed review of your book on their website and this will help promote your book to a lot of people.
2. Social Media Ads
Almost everyone is on social media nowadays. I bet you might have seen Sabri Subi’s Sell Like Crazy ads on Facebook, Instagram, or other social media platforms. I really encourage you to use the power of social media to raise awareness about your book.
Key Considerations For Successfully Making Money From Amazon Kindle
You will not make any money just by publishing a book on Amazon. You need to know the details that will help you ACTUALLY make money through Kindle Direct Publishing.
Without this knowledge, you will find yourself spinning your wheels and never actually making any money.
So don’t kid yourself – it takes more than just pressing a button to make it big in the digital publishing world. The devil is always in the details! 🙂
Here is what you need to consider if you successfully want to make money by selling your own books through KDP.
1. Make Sure Your Chosen Niche Has Enough Audience
Go to Amazon and look for books that are similar to your book’s topic. If you can find enough similar books with good reviews, you might have a good book idea. But if not, then you might need to reassess.
After all, why write a book that has been done before and is not well-received? You should also take a look at the reviews of those books—are there any particular points that people have brought up which your book could address better? If so, then you may be on to something.
2. Make Sure to Create a Solid Launch Plan
In order to market your book to the most people, you need a SOLID launch plan. Make sure you already have people waiting for your book. I’d encourage you to use email marketing campaigns for this purpose.
Promote your book on social media as well. You can use targeted advertisements and strategically scheduled posts to reach potential readers. Another great idea is to create a press kit with sample chapters, an author bio, and other content that you can send out to media outlets.
And of course, the most important thing – don’t forget about the reviews! Good reviews can do wonders for your book’s success, so make sure to encourage your readers to leave reviews and spread the word about your book.
Taking it to the Next Level: How to go beyond making money from Amazon Kindle
You can learn how to publish a book on Amazon. But is that enough? You might want to think about taking your book to the next level. This means making sure you earn royalties from it.
You should make sure you are creating a loyal audience online, making a personal brand, starting a successful author blog in your niche and ultimately turning yourself into an institution. That will provide you with not just money but also recognition – what else could you ask for?
So don’t just learn how to publish a book on Amazon, think about the bigger picture too.
Alternatives to Self-publishing on Amazon KDP
There are many different platforms for self-publishing your books. You shouldn’t ignore any of them.
Who knows which one may bring you success?
Maybe you should be looking beyond just Amazon KDP. Consider other platforms such as Ingramspark, D2D, Apple Books, Barnes & Noble, and even online libraries like Scribd.
Each platform has its own unique advantages and disadvantages so spend some time researching before deciding which one is best for your book. You may find that a combination of different platforms is the best approach for getting your book into readers’ hands.
Here are a few:
1. Ingramspark
Independent writers may publish their books as ebooks and print-on-demand (POD) books using Ingramspark. Their international distribution network distributes books and ebooks to over 40,000 locations worldwide. Any self-published indie author should use IngramSpark, especially if they prefer a more global distribution to bookstores.
2. LuLu
Lulu is a popular self-publishing platform that has been around for over 20 years. They offer print-on-demand services as well as distribution to locations all over the world. This platform is a competitor to KDP print and other similar print-on-demand service providers.
Unfortunately, Lulu has a reputation for being difficult to navigate and having suboptimal customer service. Many authors have found the platform confusing and unhelpful when it comes to resolving their issues.
Furthermore, there are multiple reports of books not being delivered as expected or having delays in production. All in all, Lulu may be worth considering if you are looking for an alternative print-on-demand option to Amazon.
3. Draft2Digital
With Draft2Digital, you can quickly create and distribute your work to different platforms.
This is a lot easier than having to set up a physical printing. Plus, D2D helps promote books by making them available to more people on popular streaming services like Amazon Kindle or Apple Books.
However, let’s not forget that the majority of indie authors still rely on old-fashioned Amazon to get their books out there.
4. Publishdrive
PublishDrive is a new platform, but it has been successful in the short time it has been around. It works with more than 4,500 traditional publishers and can connect you with more than 400 retailers.
In addition to Western stores, PublishDrive also distributes books to global markets, making it easier for indie authors to sell their books in new places.
The platform is user-friendly, making it easy to self-publish without any hassle. Plus, the customer service team is available 24/7 to answer any questions and provide assistance if needed. All in all, PublishDrive has proven itself to be a reliable distribution platform for authors looking to spread their work further and wider.
Wrapping Up
I’ve shared all you should know about how to publish a book on Amazon and start making money from it.
Self Publishing isn’t hard. In fact, if you follow the steps we discussed, it will be simple. Of course, like any business, there is an element of risk involved. But if you write a well-researched book, and do a good job marketing it, you can make a shit load of money from Amazon KDP.
I have had a lot of success with Amazon self-publishing. I have published several books (nonfiction) and made over $1,000,000 in royalties over the past few years.
I’m grateful for this experience because it has allowed me to continue doing what I love while also providing me with a steady income.
If you want to make money from writing, Amazon Kindle publishing is a great way to do it. It’s easy to start and the potential rewards are worth the effort. But don’t kid yourself—it’s not a get-rich-quick scheme.
You’ll need to put in the hard work and dedication it takes to write good books that readers will want to buy. If you’re willing to do that, then Amazon Kindle publishing may be your ticket to financial freedom!
I hope you enjoyed reading about how to publish a book on Amazon and found the information useful. Feel free to reach out if you have any questions or comments.
I hope you found this article on how to publish a book on Amazon helpful. If you have any questions or comments, please don’t hesitate to reach out.
We also have a lot of great articles on this site about how to make money writing. Check a few out before you go.
Good luck and happy publishing!